 Pin it
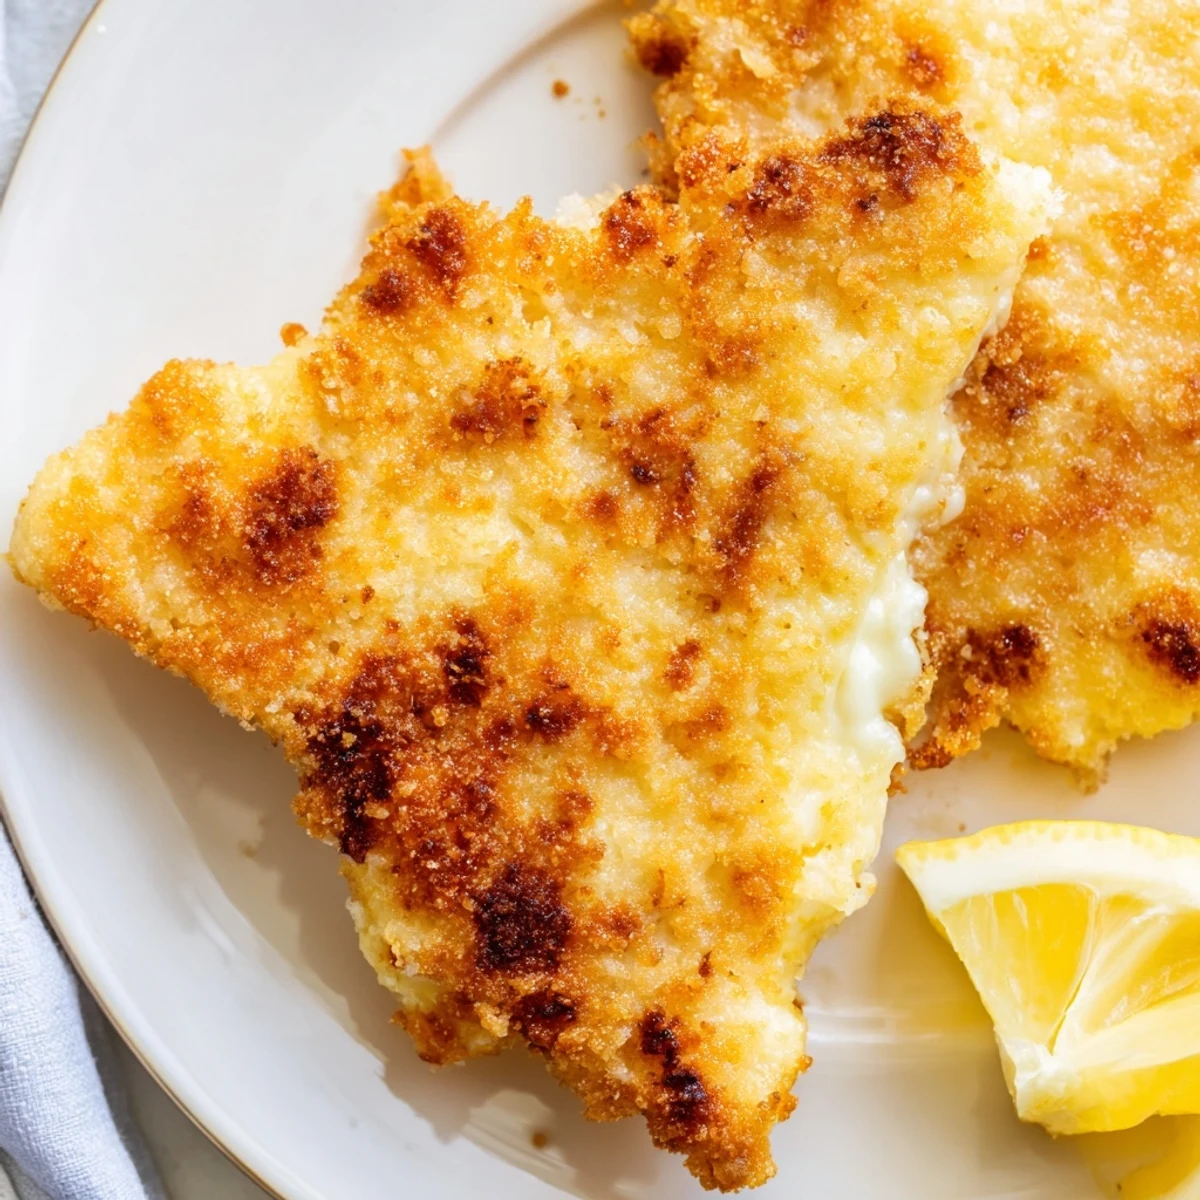
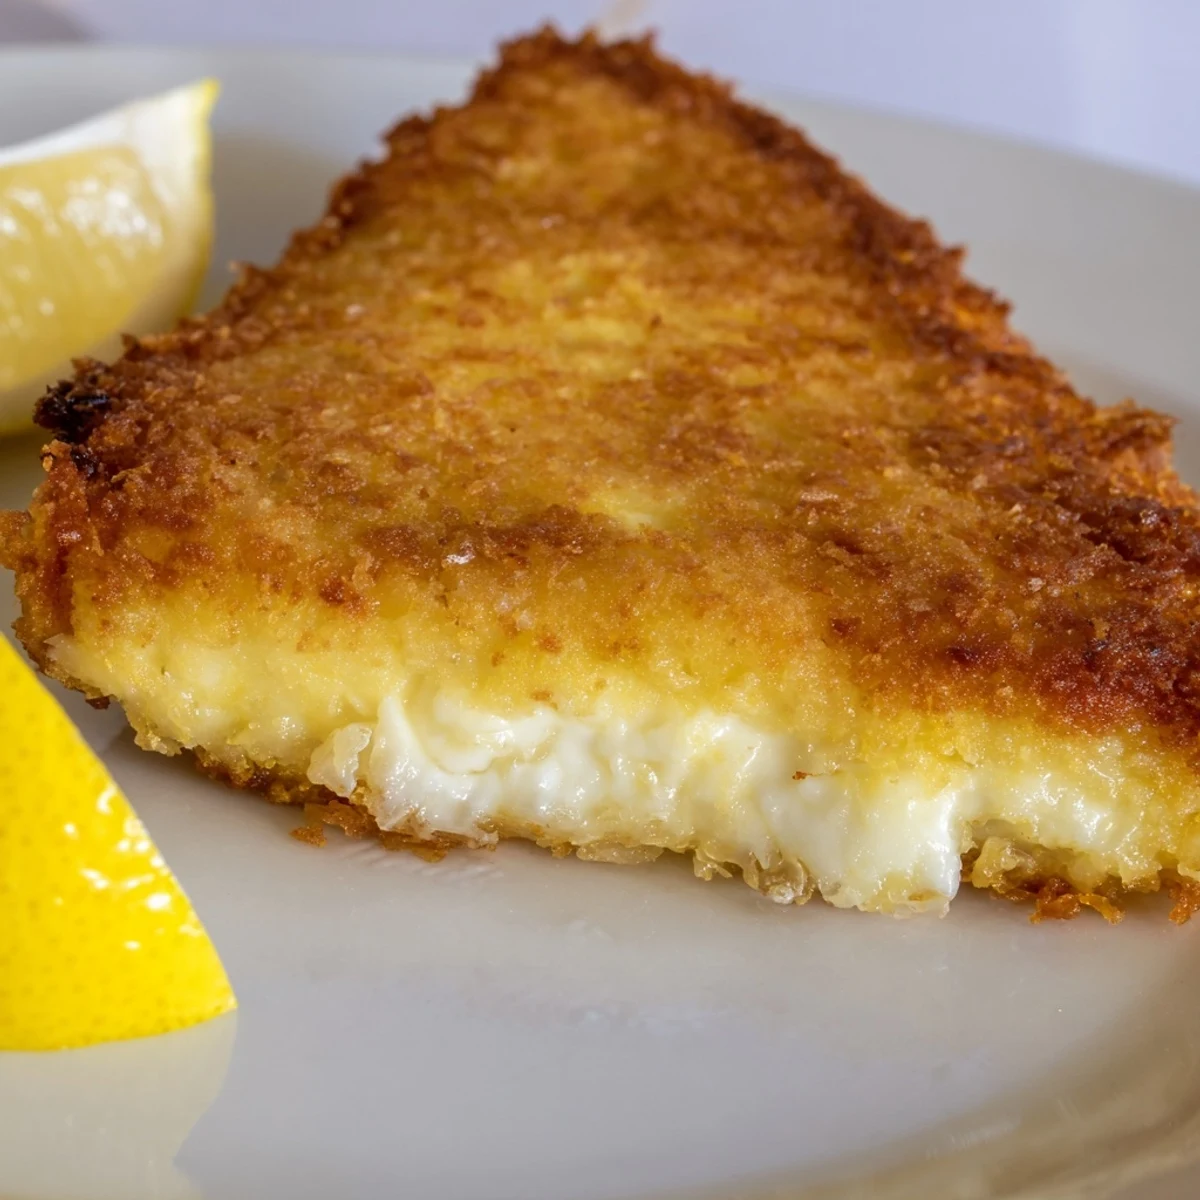
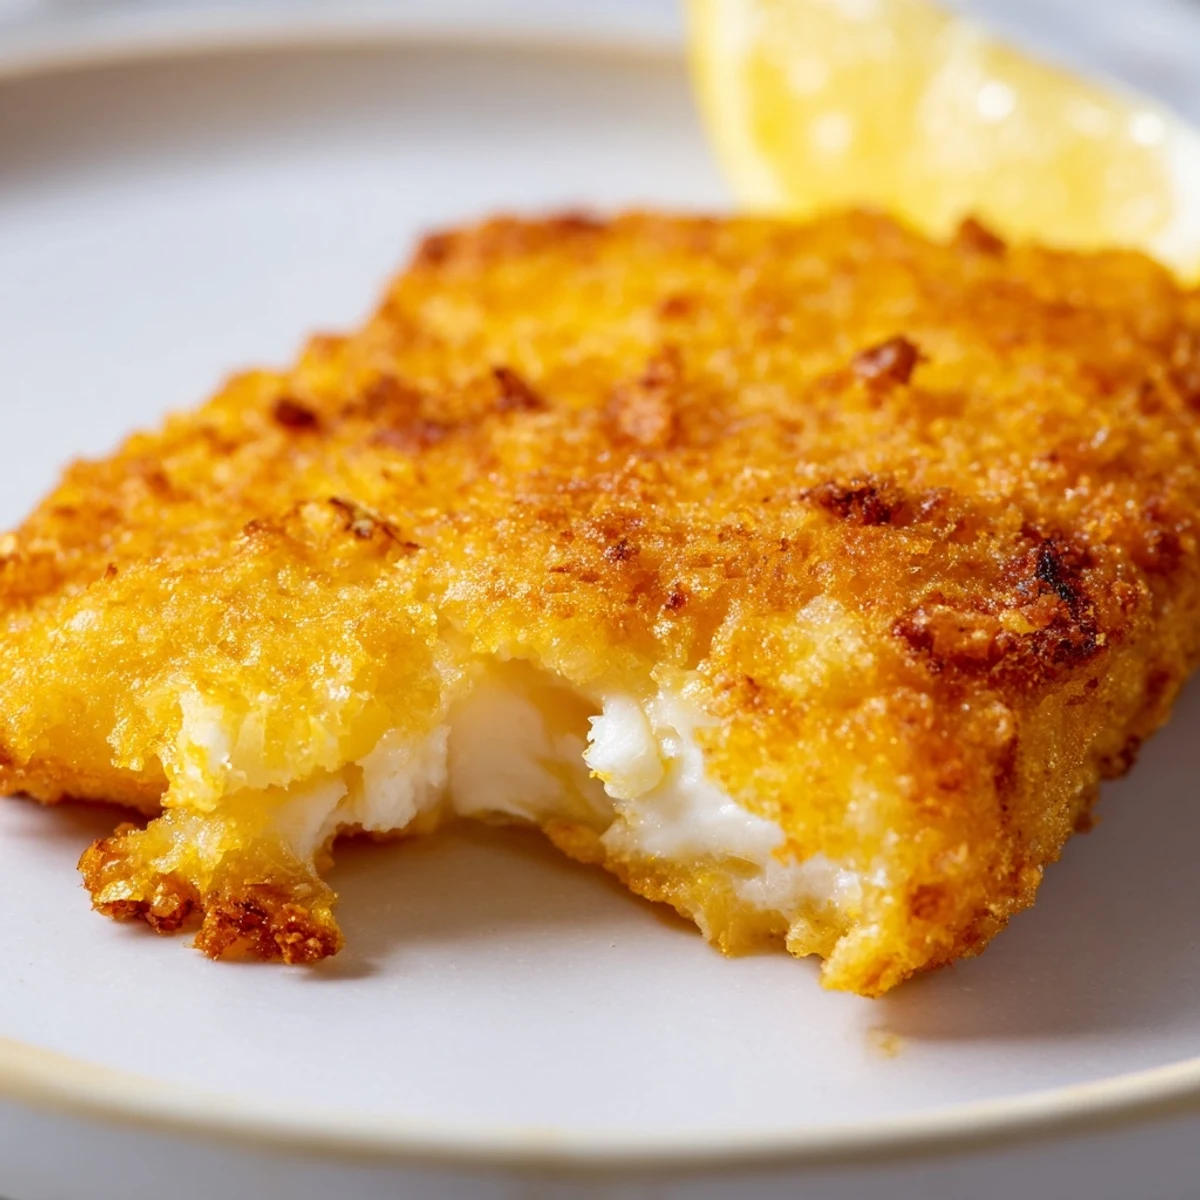
 Experience the ultimate Mediterranean appetizer with crispy Greek fried cheese. Golden and crunchy on the outside while perfectly melty inside, this classic dish—known as Saganaki—transforms simple firm cheese into a luxurious starter. The lightly seasoned flour coating creates that irresistible crunch, while high-quality olive oil imparts authentic Mediterranean depth. Ready in just 20 minutes, these golden cheese slices pair beautifully with fresh lemon wedges, chilled white wine, or traditional ouzo. Perfect for entertaining or as a sophisticated starter.
The sound of sizzling cheese in a tiny taverna in Athens still echoes in my kitchen memories. I was 22, traveling solo, and ordered something called Saganaki purely because everyone around me seemed to be eating it with such joy. When the server brought it to my table, still hissing and bubbling in its own little pan, I squeezed that lemon wedge like I'd been doing it my whole life. That first bite—crunch giving way to salty, molten perfection—taught me that sometimes the simplest foods create the most lasting impressions.
Last summer, I made this for a dinner party when a friend mentioned she'd never tried Greek food beyond gyros. I watched her eyes widen as I carried the sizzling pan to the table, the smell of fried cheese filling the entire dining room. She proceeded to eat three pieces while standing at the counter, claiming she was just quality control. Now whenever she comes over, this is the first thing she asks about before even saying hello.
Ingredients
- 250 g firm Greek cheese: Kefalotyri and Graviera are traditional choices with their perfect balance of salt and tang, though Halloumi works beautifully if that's what you can find
- 80 g gluten-free flour: This creates that essential golden crust—regular all-purpose flour works perfectly fine if you don't need it to be gluten-free
- Freshly ground black pepper: A gentle seasoning in the flour adds a subtle warmth that cuts through the rich cheese
- 3 tbsp extra virgin olive oil: Use the good stuff here since you'll taste it, and olive oil handles medium-high heat better than you might expect
- Lemon wedges: This isn't optional—that bright acid is what transforms the dish from heavy to craveable
Instructions
- Prep your cheese:
- Cut the cheese into slices about ½ inch thick and pat them thoroughly dry with paper towels—excess moisture is the enemy of a crispy crust
- Create the coating:
- Spread the flour on a plate, grind in some black pepper, and dredge each cheese slice until evenly coated, shaking off any excess
- Get the pan ready:
- Heat the olive oil in a non-stick skillet over medium-high heat until it shimmers but doesn't smoke
- Fry to golden perfection:
- Carefully add the cheese and fry for 1-2 minutes per side until deeply golden, then transfer immediately to paper towels
- Serve while sizzling:
- Bring the whole pan to the table if you can, letting everyone squeeze their own lemon wedges over the hot, crispy cheese
 Pin it
 My grandmother used to say that recipes like this are what separate cooking from cooking well. She made it for me once when I was feeling homesick during college, dropping the cheese wedges into hot oil with the confidence of someone who'd done it a thousand times. We ate them standing up in her tiny kitchen, burning our fingers on the hot cheese and laughing about how the simplest things often taste the best.
Choosing Your Cheese
After testing countless varieties in my kitchen, I've learned that cheese texture matters more than the specific name. You want something firm enough to hold its shape in the pan but with enough fat content to melt beautifully. The traditional Greek cheeses are fantastic, but don't stress if you can't find them at your regular grocery store.
Perfecting The Crust
The secret to restaurant-quality results is getting your oil properly hot before adding the cheese. I use the wooden spoon trick—stick the handle in the oil and if bubbles form around it immediately, you're ready to go. Also resist the urge to move the cheese around once it's in the pan. Let it develop that golden crust undisturbed.
Serving Suggestions
While this cheese shines on its own, I've discovered it plays wonderfully with others. A chilled glass of Assyrtiko or even a crisp sauvignon blanc cuts through the richness beautifully. Sometimes I scatter fresh oregano over the top or drizzle with honey for that sweet-salty combination Greeks do so well.
- Try crumbling leftover fried cheese over a Greek salad the next day
- A small bowl of tzatziki on the side makes for a perfect cool contrast
- Keep extra lemon wedges handy because everyone always wants more
 Pin it
 Somehow, this humble dish manages to feel both incredibly simple and utterly special every single time I make it. I hope it brings as much joy to your table as it has to mine over the years.
Recipe FAQs
- → What cheese works best for frying?
-
Kefalotyri and Graviera are traditional Greek choices that hold shape perfectly while developing a beautiful golden crust. Halloumi and firm feta make excellent alternatives, offering similar texture and melting properties.
- → How do I prevent the cheese from melting completely?
-
Pat the cheese slices dry before coating, use medium-high heat, and fry quickly—just 1-2 minutes per side. This creates the crispy exterior before the interior has time to liquefy completely.
- → Can I make this ahead of time?
-
Best served immediately for optimal crunch and melt. You can cut and coat the cheese hours ahead, storing between parchment paper in the refrigerator, then fry just before serving.
- → What should I serve with fried cheese?
-
Fresh lemon wedges are essential for that bright contrast. Consider crusty bread, olives, or a simple green salad. For authenticity, pair with chilled white wine or ouzo.
- → Is the coating necessary?
-
The flour coating creates that signature crispy texture and helps the cheese hold its shape. Seasoned with black pepper, it adds subtle flavor while protecting the cheese during high-heat frying.
