 Pin it
 This nostalgic frozen dessert combines sweetened condensed milk with freshly whipped heavy cream to create an incredibly smooth and creamy texture. The distinctive bubblegum flavor comes from concentrated flavoring, while chopped candies add chewy bursts throughout. Simply whip the cream until stiff peaks form, fold it into the flavored condensed milk mixture, add your colorful mix-ins, and freeze for at least six hours. The result is a fun, Instagram-worthy treat that captures the essence of childhood bubblegum in every spoonful. Perfect for birthday parties, summer gatherings, or anytime you need a cheerful pick-me-up.
My daughter caught me eating bubblegum ice cream straight from the container at midnight last week and didn't even ask why she just grabbed a spoon. This recipe started as a joke between us about how grown-ups don't get enough fun colors in their lives, and now it's become the most requested treat at every family gathering. There's something ridiculously satisfying about watching a room full of adults get excited over something so deliberately childish and bright.
Last summer I made three batches for a block party and watched in fascination as a group of skeptical teenagers turned into enthusiastic converts after one taste. The best part was seeing my neighbor's 70-year-old father carefully work his way through a bowl while announcing that he hadn't had bubblegum anything since 1958.
Ingredients
- Heavy whipping cream: Cold cream whips faster and holds air better, giving you that premium texture without any machinery
- Sweetened condensed milk: This magical ingredient does all the heavy lifting for texture and sweetness in one fell swoop
- Bubblegum flavoring: Start with half a teaspoon and taste, you can always add more but you cannot take it back
- Gel food coloring: Gel gives you vibrant color without watering down your mixture like liquid food coloring does
- Bubblegum candies: Chop them slightly larger than you think you should, they become the best surprise in every spoonful
Instructions
- Whip the cream:
- Beat that cold heavy cream until it stands up tall when you lift the beaters, this is the foundation of everything
- Prepare the flavor base:
- Whisk the sweetened condensed milk with vanilla, bubblegum flavoring, and any food coloring until it's completely smooth
- Combine everything:
- Gently fold the whipped cream into the flavored milk mixture, being careful not to knock out all the air you just worked so hard to create
- Add the fun stuff:
- Fold in the chopped bubblegum candies, imagining how happy your future self will be when you discover them later
- Freeze patiently:
- Pour into a loaf pan, smooth the top, add any extra decorations, then cover and freeze for at least six hours
 Pin it
 My niece asked if we could make rainbow bubblegum ice cream for her birthday, and we ended up with the most spectacular mess in the kitchen. The photos from that party are some of my favorites because everyone has bright blue tongues and is laughing so hard they can barely eat.
Getting The Perfect Swirl
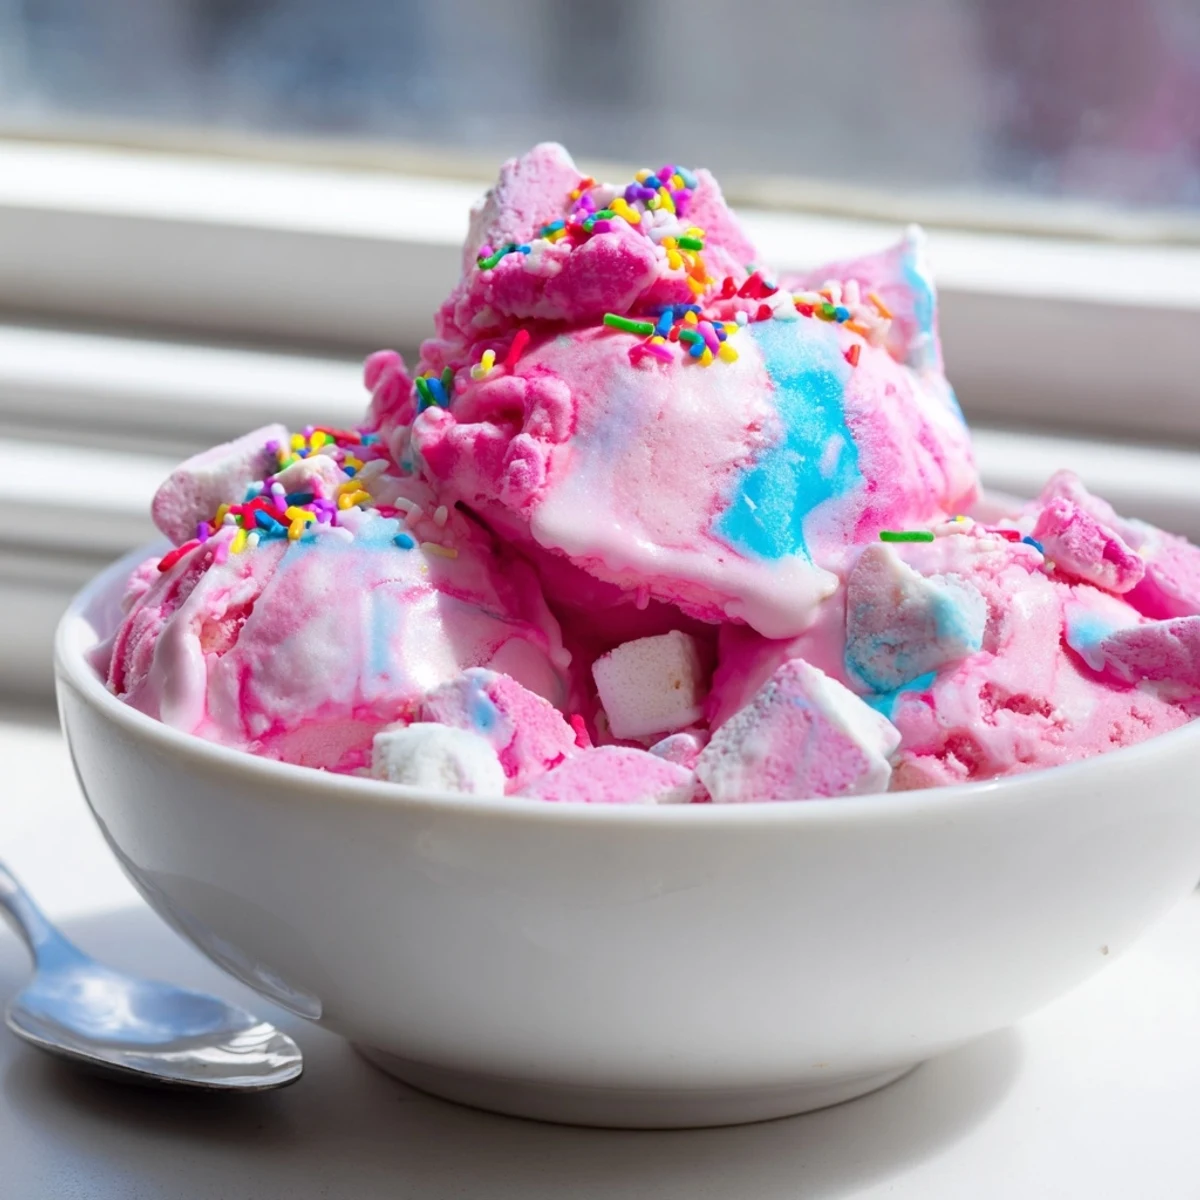
If you want that marbled look with both pink and blue, don't fully mix the food coloring into the base. Instead, drop dollops of each color onto the whipped cream before folding, then gently swirl through just once or twice. The result looks like cotton candy clouds in your bowl.
Temperature Magic
This ice cream is best served after sitting on the counter for exactly seven minutes. I know that sounds oddly specific, but I've tested it extensively and seven minutes gives you the perfect scoopable consistency. Anything less and you're fighting with it, anything more and it starts melting too fast.
Mix-In Adventures
The classic bubblegum candies are perfect, but sometimes we get wild and add crushed waffle cones or tiny marshmallows. The key is keeping your add-ins smaller than a marble so they distribute evenly throughout. Try sprinkling some extra candies on top during the last hour of freezing for that professional ice cream shop look.
- If you cannot find bubblegum flavoring, cotton candy flavoring works surprisingly well
- Freeze your container for 15 minutes before pouring in the mixture for faster setting
- This recipe doubles beautifully if you are feeding a crowd or just really love ice cream
 Pin it
 There's something wonderfully subversive about making something so deliberately colorful and fun in your kitchen. Life is too short for boring desserts.
Recipe FAQs
- → Do I need an ice cream maker for this?
-
No, this method uses sweetened condensed milk and whipped cream to create a creamy texture without any special equipment. Just a mixer and freezer are needed.
- → Where can I find bubblegum flavoring?
-
Bubblegum flavoring is available at baking supply stores, craft stores, or online retailers. Look for concentrated candy flavoring in the baking aisle.
- → How long does this need to freeze?
-
The ice cream needs at least 6 hours in the freezer to firm completely. For best results, let it freeze overnight before serving.
- → Can I make different flavors?
-
Absolutely. Replace the bubblegum flavoring with other extracts like mint, strawberry, or root beer. Adjust the food coloring to match your chosen flavor.
- → How should I store leftover ice cream?
-
Keep the ice cream tightly covered in the freezer. It will maintain its best quality for up to 2 weeks, though it may become slightly icy after the first week.
