 Pin it
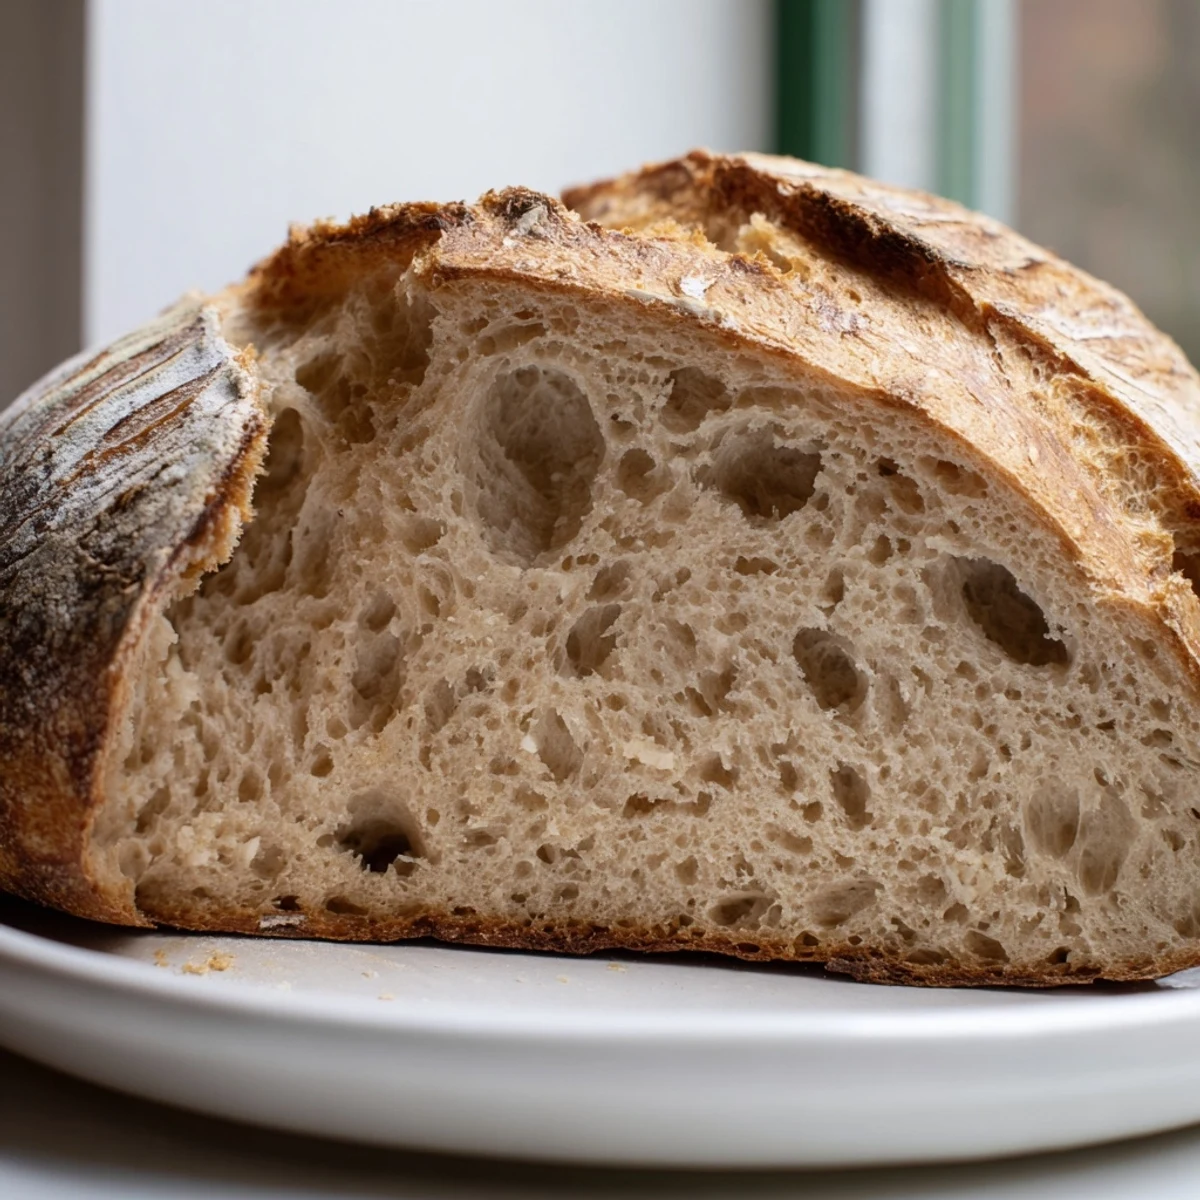
 Craft authentic sourdough bread using naturally fermented wild yeast starter. This traditional method produces a beautiful crusty exterior with an open, chewy crumb and distinctive tangy flavor profile. The process involves autolyse, stretch-and-fold techniques during bulk fermentation, careful shaping, and high-heat baking in a Dutch oven for professional results. Expect 14-20 hours from start to finish, including fermentation and proofing time. Your patience rewards you with bakery-quality bread perfect for pairing with cultured butter, olive oil, or as sandwich base.
The smell of sourdough baking transforms my entire mood, filling the kitchen with that distinctive fermented warmth that makes any apartment feel like home. My first attempts were dense bricks that could double as doorstops, but there is something magical about watching wild yeast work. Now, after years of weekend mornings spent staring at bubbling starters, I have found my rhythm.
Last winter, during that week everything felt gray and heavy, I decided to bake three loaves just to see the process through. The whole house smelled like fermentation and comfort, and my roommate kept wandering into the kitchen asking if it was done yet. We ate that first loaf standing at the counter, ripping off pieces still warm from the oven, with butter melting into every nook and cranny.
Ingredients
- 100 g active sourdough starter: This living culture is the heart of your bread, so make sure it has been fed within the last 12 hours and looks bubbly and active
- 375 g bread flour: High protein flour creates the structure needed for those beautiful air pockets and chewy texture
- 25 g whole wheat flour: Just enough to add depth and nuttiness without weighing down the crumb
- 275 g water: Room temperature water helps the dough develop strength without shocking the yeast
- 10 g sea salt: Do not skip this, it tightens the gluten structure and keeps fermentation from going too wild
Instructions
- Autolyse and rest:
- Mix the bread flour, whole wheat flour, and water in a large bowl until just combined, then cover and let it rest for 1 hour so the flour can fully hydrate
- Work in the starter:
- Add the sourdough starter and sea salt to your dough, mixing by hand until everything is fully incorporated and the dough starts to come together
- Bulk fermentation:
- Cover the bowl and let it ferment at room temperature for 4 to 5 hours, performing stretch and folds every 30 to 45 minutes to build strength
- Pre-shape the dough:
- Turn the dough onto a lightly floured surface and gently shape it into a round, then cover and let it rest for 20 minutes to relax the gluten
- Final shaping:
- Shape the dough into a tight round loaf, creating surface tension, then place it seam side up in a well floured proofing basket
- Proof until ready:
- Cover and let the dough rise at room temperature for 2 to 3 hours, or refrigerate overnight if you want a more pronounced sour flavor
- Get the oven ready:
- Place a Dutch oven or heavy pot with its lid inside the oven and preheat to 480°F for at least 30 minutes so it gets screaming hot
- Score and bake:
- Gently invert the dough onto parchment paper, score the surface with a sharp blade, transfer to the preheated pot, cover, and bake for 20 minutes before removing the lid and reducing the temperature to 430°F for another 25 minutes
- Cool completely:
- Let the bread cool on a wire rack for at least an hour before slicing, or the crumb will be gummy and you will regret every second of your impatience
 Pin it
 This bread has become my go to for housewarming gifts and dinner parties. Something about handing someone a loaf you made yourself feels deeply personal, like you are giving them a piece of your time and attention.
Reading Your Dough
Learning to read fermentation signs takes practice but pays off. Watch for the dough to grow by about 50 percent during bulk fermentation, and look for bubbles on the surface and underneath. When you poke it with a floured finger, the indentation should fill in slowly but not completely spring back.
Flour Variations
Once you are comfortable with the basic recipe, try swapping the whole wheat for rye flour to add earthy notes. You can also use all bread flour for a milder flavor, or increase the whole wheat up to 20 percent of the total flour weight for more complexity.
Storage and Refreshing
Store your loaf cut side down on a cutting board, wrapped in a clean kitchen towel, for up to two days. After that, slice and freeze what remains, then refresh frozen slices in a 350°F oven for 10 minutes to restore the crust.
- Never store sourdough in plastic bags or the crust will soften and the flavor will turn stale
- Refresh day old bread by sprinkling it with water and heating at 375°F for 10 minutes
- Sourdough makes exceptional toast and French bread pudding when it is past its prime
 Pin it
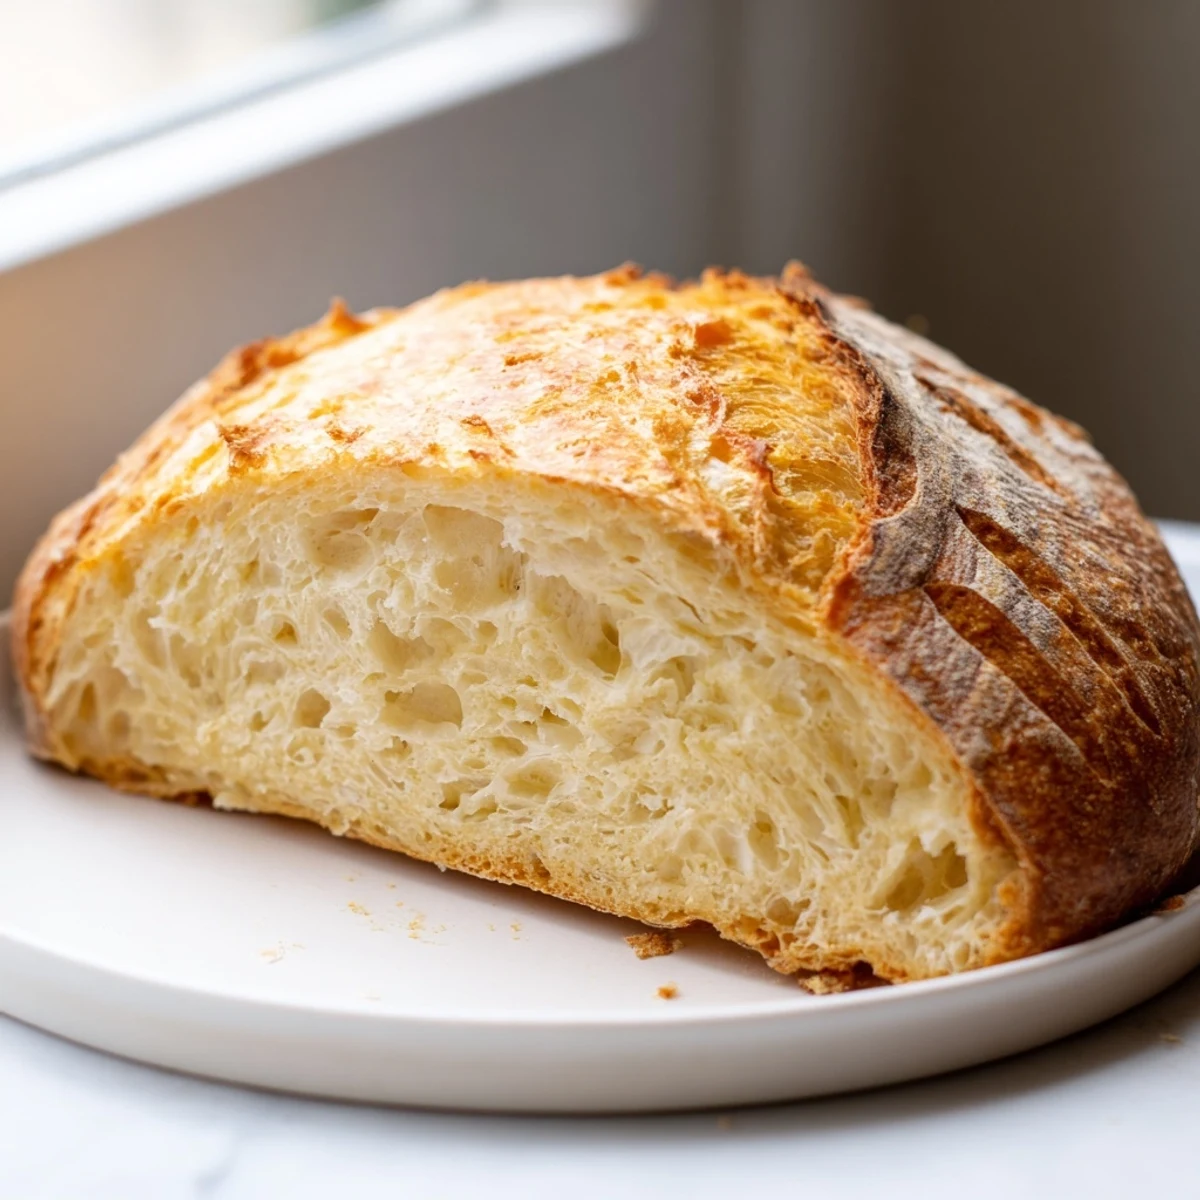
 There is nothing quite like tearing into a homemade loaf, still warm from the oven, with butter pooling in every crater. Trust the process and let your starter teach you patience.
Recipe FAQs
- → What makes sourdough different from regular bread?
-
Sourdough relies on wild yeast and beneficial bacteria naturally present in flour rather than commercial yeast. This fermentation creates lactic acid, producing the characteristic tangy flavor while making nutrients more bioavailable and improving digestibility.
- → How do I know when my starter is ready to use?
-
Your starter should be fed 8-12 hours before baking and appear bubbly, doubled in volume, with a pleasant fermented aroma. When you drop a spoonful into water, it should float, indicating proper fermentation activity.
- → Can I skip the stretch and fold steps?
-
While possible, stretch and folds develop gluten structure without kneading, creating the characteristic open crumb. Skipping them may result in denser texture. Perform four sets spaced 30-45 minutes apart during bulk fermentation for best results.
- → Why bake in a Dutch oven?
-
The Dutch oven creates steam, essential for crust development. Trapped moisture allows the loaf to expand fully before the crust sets, resulting in better oven spring and that signature crackly, golden-brown exterior.
- → How long does sourdough stay fresh?
-
Properly cooled and stored in a paper bag at room temperature, sourdough maintains quality for 3-4 days. The natural acidity acts as a preservative. For longer storage, slice and freeze, then toast individual slices as needed.
- → What if I don't have a proofing basket?
-
A well-floured bowl lined with a clean kitchen towel works perfectly. The flour coating prevents sticking while the towel provides structure. Ensure generous dusting with rice flour or all-purpose flour for easy release.
