 Pin it
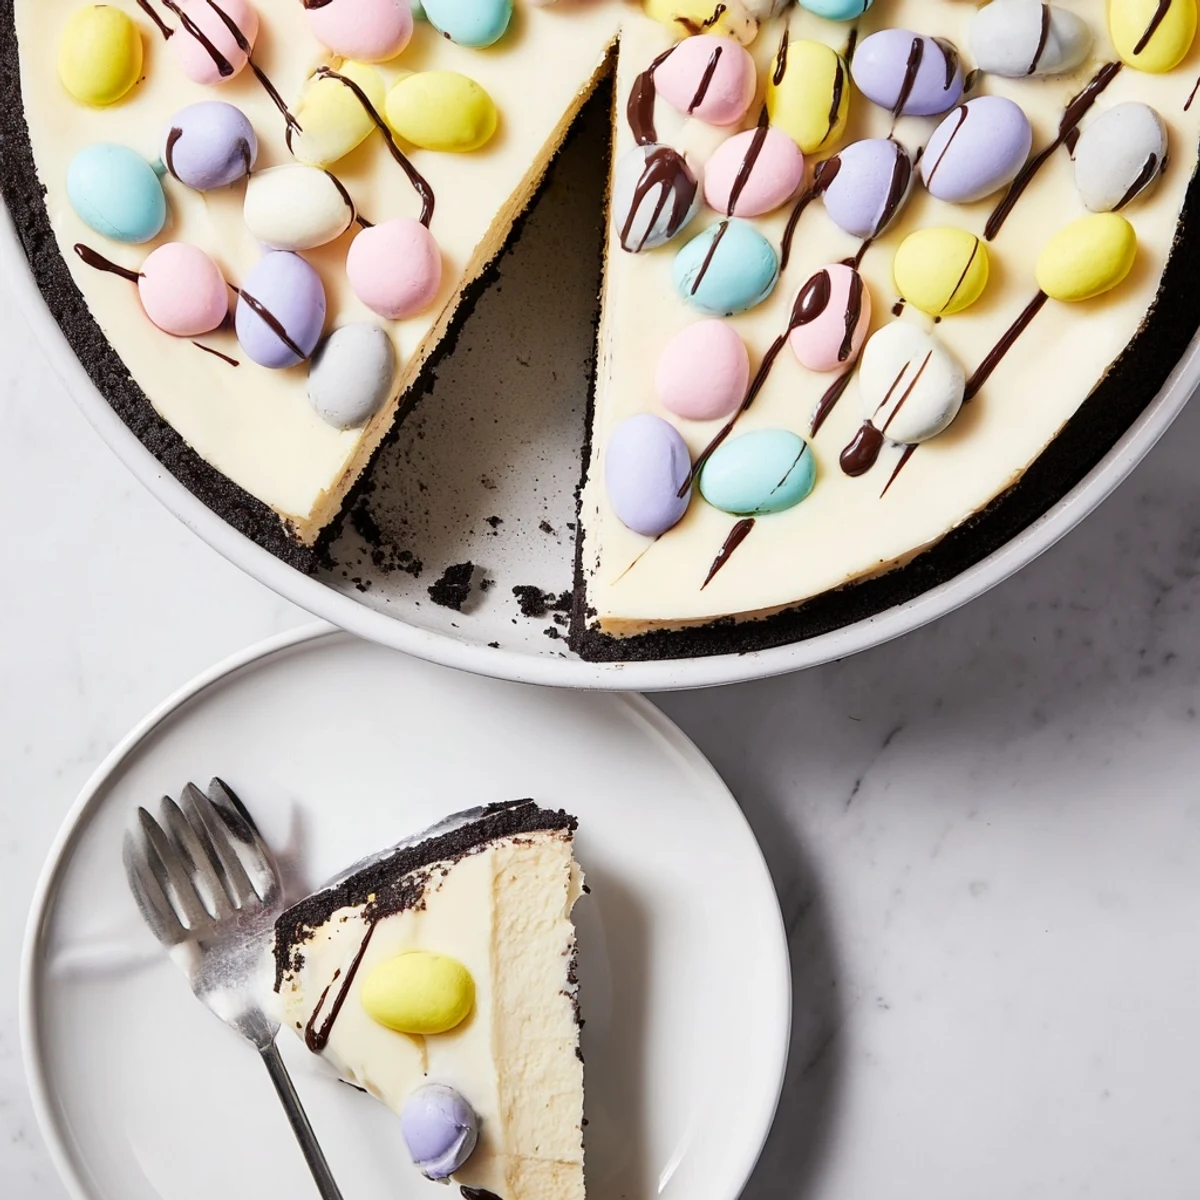
 This festive dessert combines a rich chocolate cookie base with an exceptionally smooth cream cheese filling infused with vanilla and bright lemon zest. After slow baking and proper cooling, the cheesecake develops that signature velvety texture that makes it so irresistible. The crowning touch comes from colorful mini chocolate Easter eggs scattered across the top, with optional white chocolate drizzle adding extra sweetness. This showstopping centerpiece requires patience during chilling but rewards you with restaurant-quality results that will impress any spring gathering.
The smell of chocolate sandwich cookies being crushed always takes me back to my first Easter hosting dinner. I had spent all morning prepping sides when I realized I had forgotten dessert entirely. A quick rummage through the pantry revealed a package of Oreos and some Easter candy my niece had left behind. That impromptu cheesecake ended up being the star of the meal.
Last spring my sister requested this for her birthday instead of a traditional cake. When I brought it out after dinner, the way the mini Easter eggs caught the candlelight made the whole table gasp. Seeing the kids' faces light up as they spotted their favorite colors was better than any present I could have bought. Now it is not really Easter at our house without this cheesecake making an appearance.
Ingredients
- 200 g chocolate sandwich cookies: The dark chocolate flavor provides a rich foundation that complements the sweet filling without overwhelming it
- 75 g unsalted butter, melted: Binding the crust together properly prevents crumbling when you slice the finished cheesecake
- 600 g full-fat cream cheese: Room temperature cream cheese eliminates lumps and creates that signature velvety texture
- 150 g granulated sugar: This amount sweetens without making the cheesecake cloying or dense
- 2 tbsp cornstarch: The secret ingredient that stabilizes the filling and prevents cracking while baking
- 200 ml sour cream: Adds a subtle tang that cuts through the richness and keeps the filling silky
- 3 large eggs: Add these one at a time to prevent overmixing which can introduce air bubbles
- 1 tsp pure vanilla extract: Pure vanilla makes a noticeable difference in the depth of flavor
- Zest of 1 lemon: Fresh zest brightens the entire cheesecake and balances the chocolate crust
- 100 g mini chocolate Easter eggs: A mix of pastel and speckled eggs makes the most visually stunning presentation
- 50 g white chocolate, melted: The drizzle is optional but adds an elegant finishing touch
Instructions
- Prepare the pan and crust:
- Preheat your oven to 160°C (320°F) and line the base of a 23 cm springform pan with parchment paper. Crush the cookies into fine crumbs and mix them with melted butter until evenly coated, then press the mixture firmly into the bottom of the pan and chill while you make the filling.
- Make the creamy filling:
- Beat the cream cheese and sugar in a large bowl until completely smooth with no lumps remaining. Add the cornstarch and mix well, then blend in the sour cream, eggs one at a time, vanilla extract, and lemon zest until just combined.
- Bake to perfection:
- Pour the filling over the chilled crust and smooth the top with a spatula. Bake for 50 to 60 minutes until the edges are set but the center still has a gentle wobble when you gently shake the pan.
- Cool slowly and patiently:
- Turn off the oven and crack the door open, letting the cheesecake cool inside for 1 hour to prevent sudden temperature changes that cause cracks. Remove to room temperature until completely cool, then cover and refrigerate for at least 4 hours or overnight.
- Decorate and serve:
- Arrange the mini chocolate Easter eggs over the surface however you like and drizzle with melted white chocolate if you want extra flair. Unlock the springform ring carefully and slice with a sharp knife dipped in hot water for clean cuts.
 Pin it
 My neighbor started making this for every church potluck after she tried it at our Easter brunch. She told me it has become her signature dessert because people actually remember it and ask for the recipe. There is something about a homemade cheesecake that makes people feel truly celebrated.
Making It Ahead
This cheesecake actually develops better flavor when made a day or two before serving. The texture firms up beautifully and the flavors have time to meld together. Store it tightly covered in the refrigerator and add the decorations just before serving to keep the eggs looking fresh and vibrant.
Getting The Perfect Wobble
Learning to trust that slightly jiggly center took me years to master. The trick is gently tapping the side of the pan rather than shaking it vigorously. If the center moves like soft custard while the edges remain firm, you have achieved cheesecake perfection. Overbaking will result in a dry and crumbly texture that no amount of topping can fix.
Creative Variations
While the classic chocolate and vanilla combination is hard to beat, there are plenty of ways to make this recipe your own. I have swapped the lemon zest for orange during autumn and added crushed candy canes at Christmas. The crust can be made with any chocolate cookie, and the filling welcomes extracts like almond or coconut quite happily.
- Try substituting the Oreos with chocolate graham crackers for a lighter crust
- Add a layer of raspberry jam between the crust and filling for a fruity surprise
- Use dark chocolate Easter eggs for a more sophisticated flavor profile
 Pin it
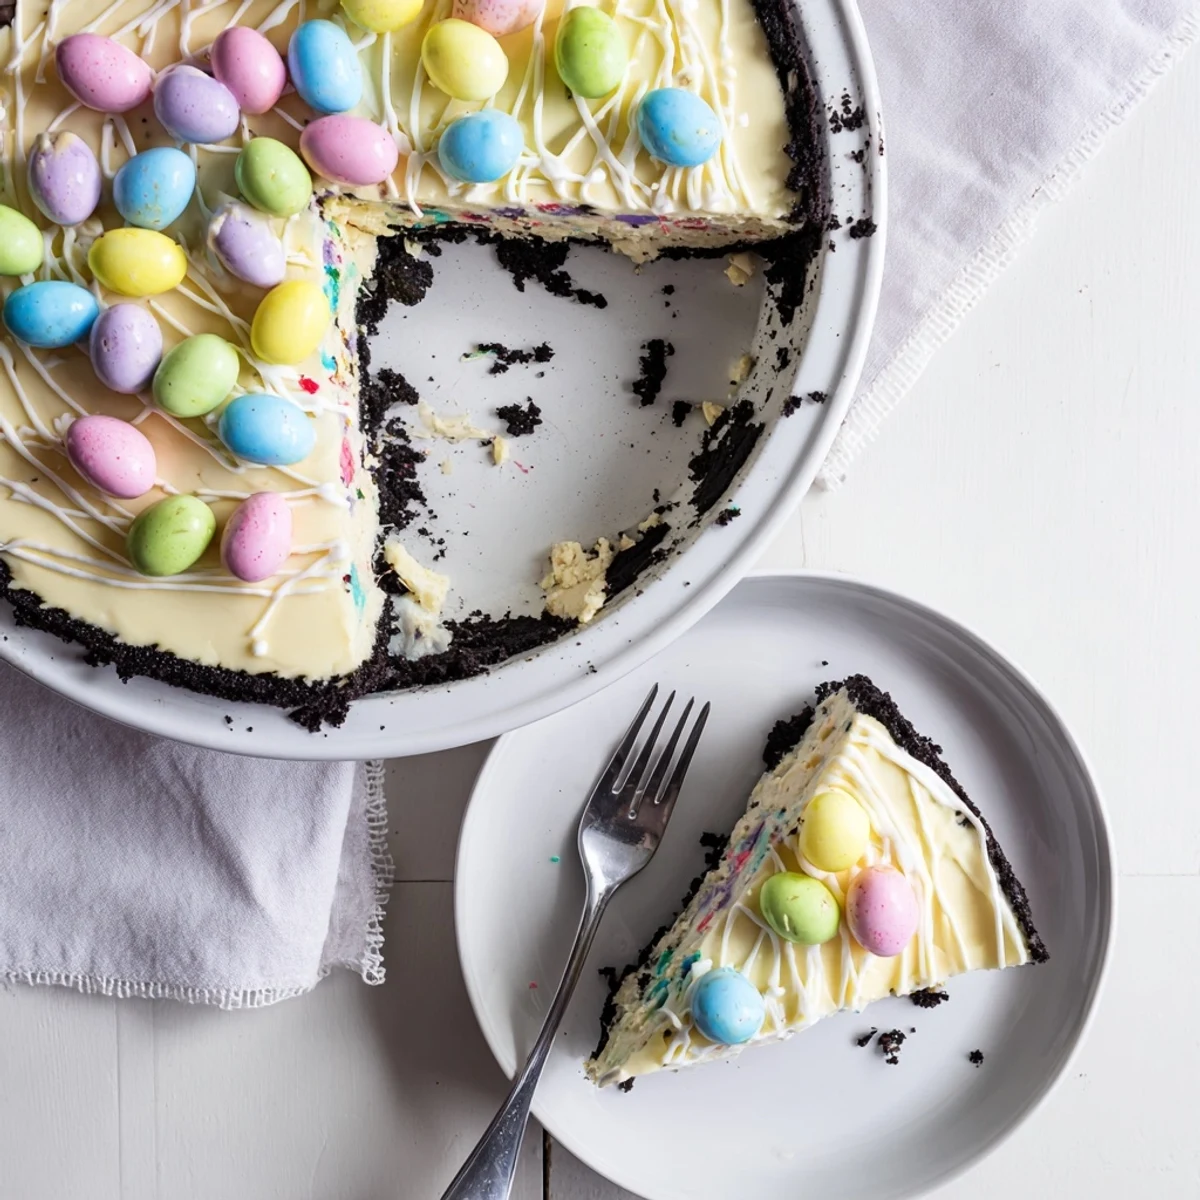
 There is nothing quite like serving this dessert and watching everyone's eyes light up when they spot the colorful eggs nestled in the creamy vanilla filling. It has become the sweet beginning of our family's spring tradition.
Recipe FAQs
- → Can I make this cheesecake ahead of time?
-
Absolutely. In fact, this cheesecake tastes even better when made 1-2 days in advance, allowing flavors to fully develop. Keep it tightly covered in the refrigerator until ready to serve.
- → How do I prevent cracks from forming?
-
The key is avoiding overbeating the eggs and letting the cheesecake cool gradually inside the oven with the door cracked. This gentle cooling prevents temperature shock that causes cracking.
- → Can I freeze this cheesecake?
-
Yes, freeze the whole cheesecake (without decoration) for up to 3 months. Wrap tightly in plastic and foil. Thaw overnight in the refrigerator before decorating with eggs.
- → What's the purpose of cornstarch in the filling?
-
Cornstarch helps stabilize the filling, preventing cracking while maintaining that creamy texture. It's a secret ingredient for professional-looking results every time.
- → Can I use regular eggs instead of chocolate ones?
-
You can use any festive toppings like pastel sprinkles, shredded coconut, or fresh berries. However, the chocolate eggs add delightful crunch and seasonal charm that makes this dessert special.
- → Why does the center need to wobble after baking?
-
The slight wobble indicates proper texture. The filling continues cooking from residual heat as it cools, so removing it while still jiggly ensures you won't end up with a dry, overbaked cheesecake.
