 Pin it
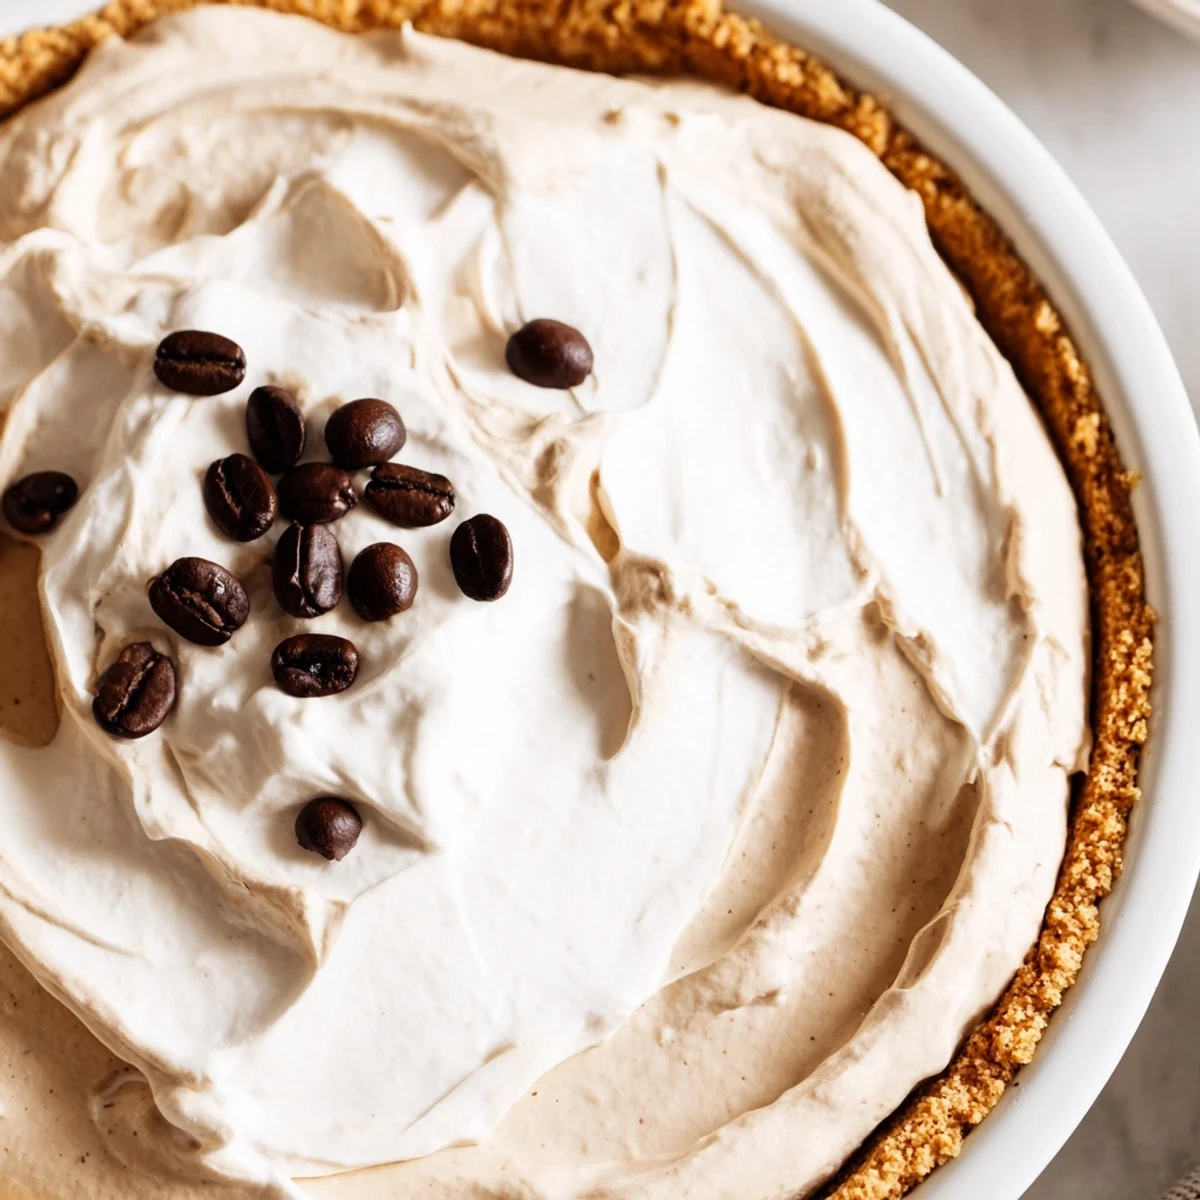
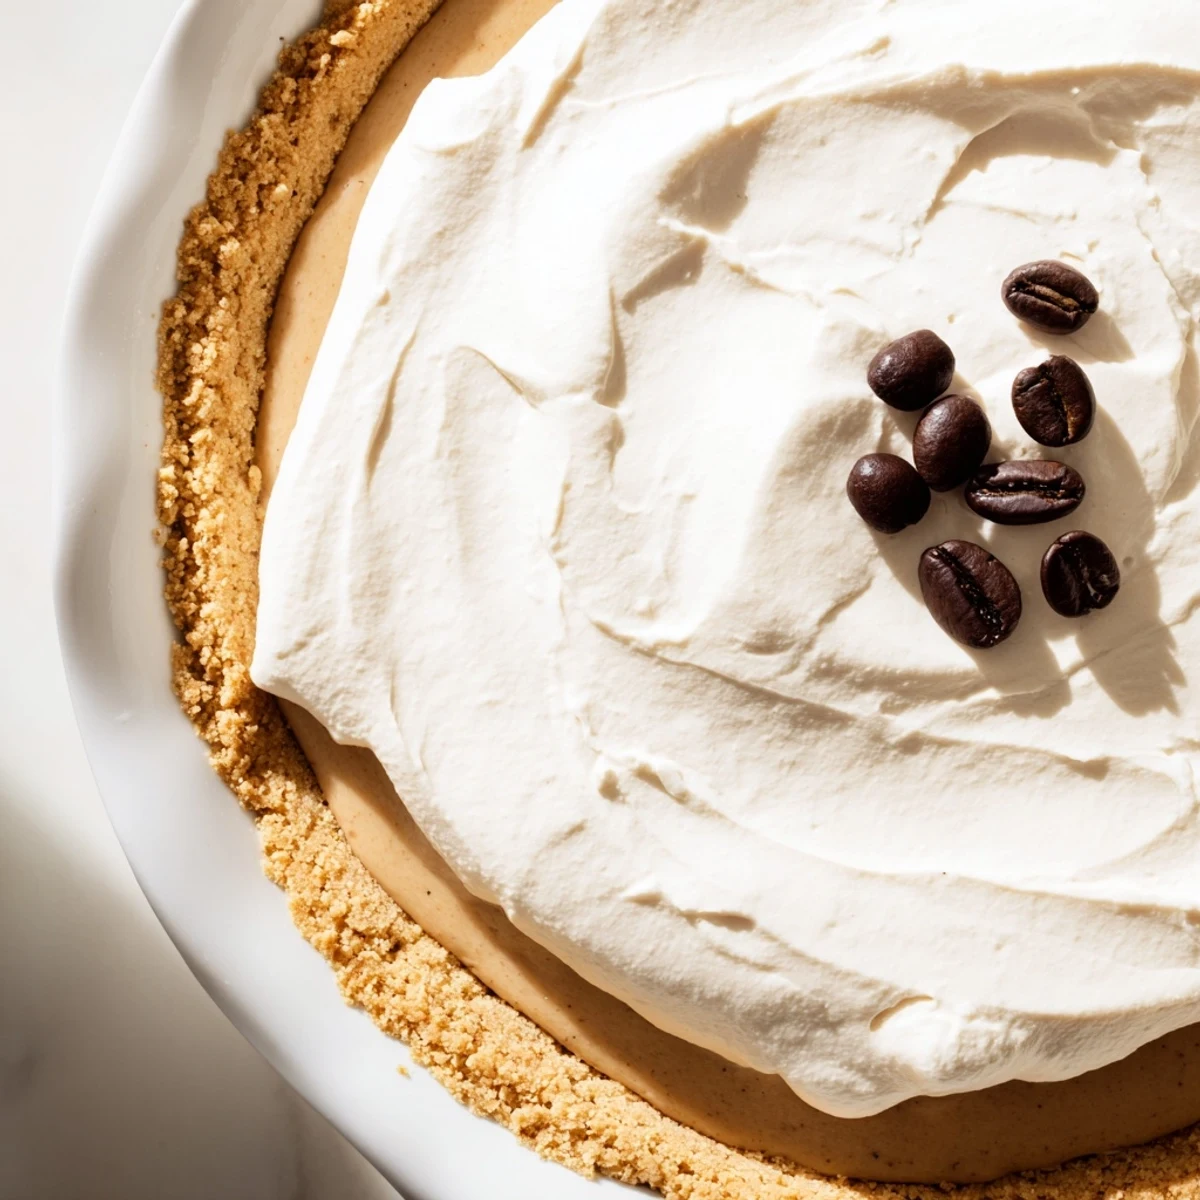
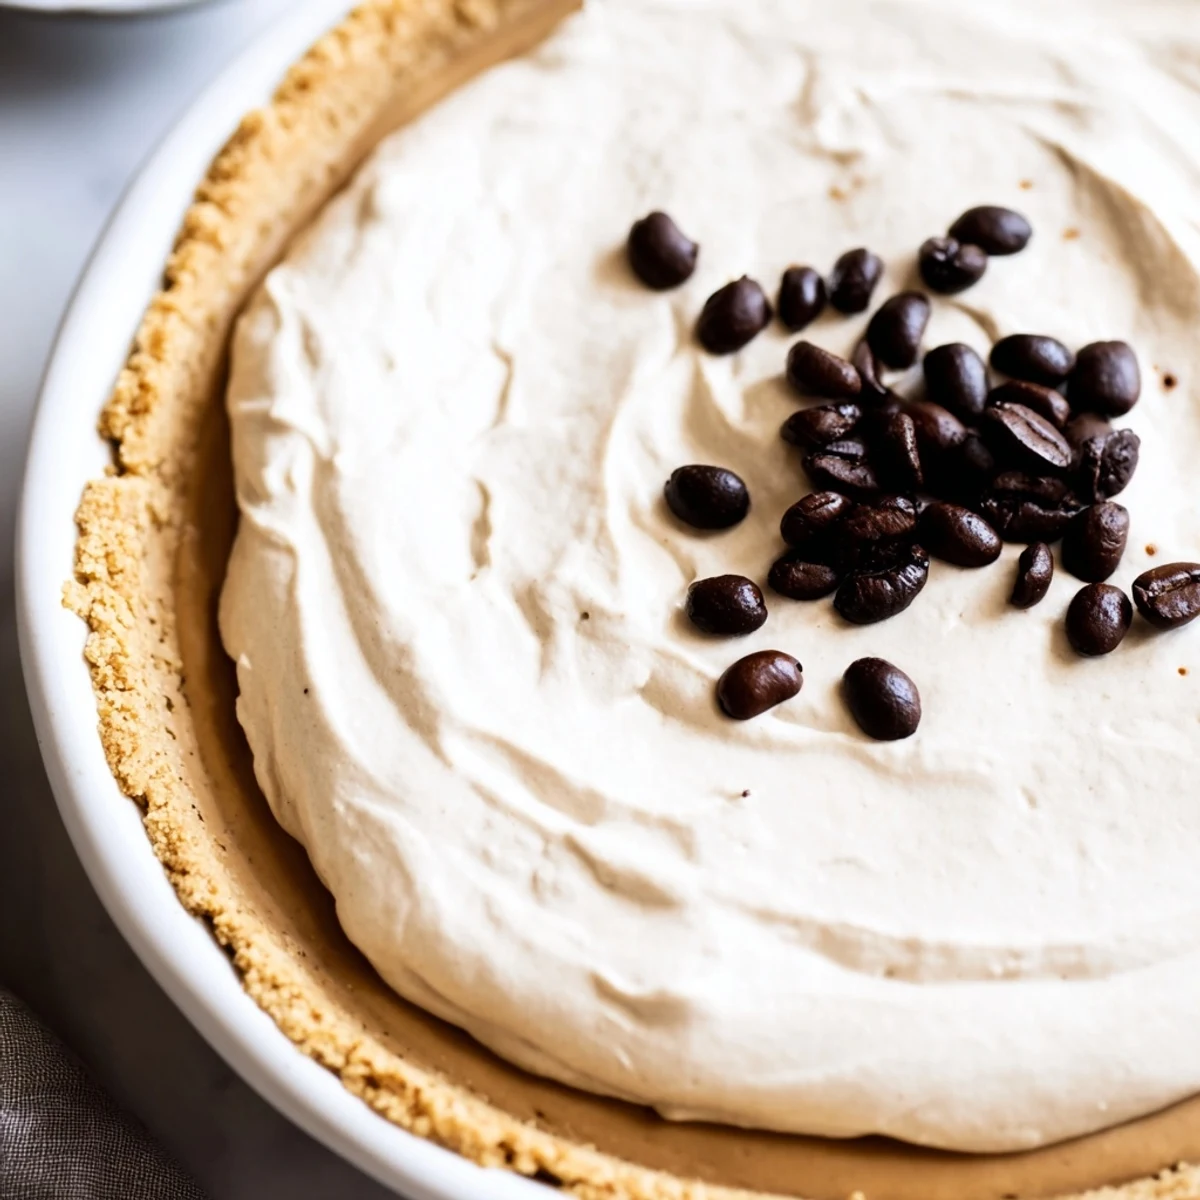
 This luscious cold brew pie features a crisp almond flour crust baked to golden perfection. Its filling blends bold cold brew coffee with smooth cream cheese and whipped cream, set with gelatin for a no-bake finish. Topped with a fluffy whipped cream layer and optionally garnished with coffee beans or cocoa powder, this dessert balances bold coffee notes with creamy textures. Ideal chilled and perfect for keto and gluten-free preferences, it offers a quick preparation and satisfying finish for coffee lovers seeking a rich, low-carb treat.
My sister-in-law brought this to our July 4th gathering last summer, and I honestly didnt believe it was keto until she showed me the recipe. One bite of that cool, creamy coffee filling and I was completely sold—now it's the most requested dessert at every family gathering, even by the non-keto folks who usually turn their noses up at sugar-free treats.
I made this for my book club last month and served it before mentioning it was low carb. Everyone went silent for a full minute—just the sound of forks clinking against plates. When I finally told them they'd just eaten something keto-friendly, two people immediately asked for the recipe, and one woman actually said she'd pay me to make it for her birthday instead of a regular cake.
Ingredients
- 1 1/2 cups almond flour: This forms the foundation of your crust—I've learned that finely ground almond flour works best here, the kind that feels almost like powdered sugar when you rub it between your fingers
- 1/3 cup powdered erythritol: Powdered sweetener dissolves so much better than granular, which means no weird gritty texture in your smooth filling
- 1/4 cup unsalted butter, melted: I always use grass-fed butter when I can find it—the slightly nutty flavor plays so nicely with the coffee
- Pinch of salt: Dont skip this—salt is what makes the chocolate and coffee flavors pop and taste more intense
- 1 cup cold brew coffee, unsweetened: Cold brew is less acidic than hot-brewed coffee, which means your pie won't have that bitter aftertaste that some people can't stand
- 8 oz (225 g) cream cheese, softened: Room temperature cream cheese is non-negotiable here—I once tried to speed things up with softened-in-the-microwave cream cheese and ended up with tiny lumps throughout my filling
- 1/2 cup heavy whipping cream: This gets whipped into the filling for that cloud-like texture that makes this pie feel indulgent
- 1/3 cup powdered erythritol: Sweetening the filling to balance out that bold coffee kick
- 1 tbsp gelatin powder: This is your secret weapon for a sliceable pie that holds its shape beautifully instead of collapsing into a puddle when you cut it
- 2 tbsp cold water: For blooming the gelatin—cold water is crucial here because hot water will start the gelatin setting too quickly
- 1 tsp vanilla extract: Pure vanilla extract adds this lovely warmth that rounds out the sharp coffee notes
- 1/2 cup heavy whipping cream: For that dreamy topping—make sure your cream is very cold for the best results
- 1 tbsp powdered erythritol: Just enough sweetness to balance the rich cream without overpowering the coffee flavor
- Coffee beans or cocoa powder: These are totally optional but that little dusting of cocoa on top makes this look like something from a pastry shop window
Instructions
- Get your crust started:
- Preheat your oven to 350°F (175°C)—I like to do this about 15 minutes before I start mixing anything so it's fully ready and at the right temperature when my crust is pressed into the dish.
- Mix the crust ingredients:
- In a medium bowl, combine your almond flour, powdered erythritol, melted butter, and that pinch of salt until everything looks like wet sand and holds together when you squeeze a handful.
- Press and bake the crust:
- Firmly press the mixture into the bottom and up the sides of a 9-inch pie dish—I use the flat bottom of a measuring cup to get it really even and packed tight, then bake for 8–10 minutes until it smells nutty and looks lightly golden.
- Bloom your gelatin:
- While the crust cools completely, sprinkle the gelatin over cold water in a small bowl and let it sit for 5 minutes until it looks like little translucent sheets that have absorbed all the water.
- Melt the gelatin:
- Microwave your bloomed gelatin for 10–15 seconds—it should be completely liquid and clear with no visible granules, and be careful not to let it boil or it loses its setting power.
- Beat the cream cheese:
- In a large bowl, beat your softened cream cheese with the powdered erythritol until it's completely smooth and creamy—this takes about 2-3 minutes with an electric mixer, and you'll know it's ready when there are absolutely no lumps left.
- Add the coffee flavor:
- Pour in your cold brew coffee and vanilla extract, then mix until everything is fully combined and the mixture looks like a gorgeous tan latte color.
- Whip the cream:
- In a separate bowl, whip that 1/2 cup of heavy cream until you have stiff peaks—you should be able to turn the bowl upside down without the cream moving at all.
- Fold it all together:
- Gently fold your whipped cream into the cream cheese mixture using a spatula, being careful not to deflate all those air bubbles you just worked so hard to create.
- Add the gelatin:
- Pour in that melted gelatin while stirring continuously—you want it incorporated quickly but gently so it doesn't start setting up in streaks.
- Fill your crust:
- Pour the filling into your completely cooled crust and smooth the top with an offset spatula or the back of a spoon—I like to give the dish a couple of gentle taps on the counter to release any air bubbles.
- Chill until set:
- Refrigerate for at least 2 hours—the filling should be firm to the touch and not jiggle like liquid when you gently shake the dish.
- Make the topping:
- Whip your remaining 1/2 cup heavy cream with the tablespoon of powdered erythritol until you have those same stiff peaks as before.
- Top it off:
- Spread or pipe the whipped cream over your chilled pie—I use a piping bag with a large star tip for that professional bakery look, but spreading it with an offset spatula works perfectly fine too.
- Garnish and serve:
- Add a few coffee beans or a light dusting of cocoa powder if you're feeling fancy, then serve this beauty cold straight from the fridge.
 Pin it
 My husband, who swore he'd never like a keto dessert, now requests this for his birthday instead of traditional cake. Last year I made it for our anniversary dinner and we ended up eating half the pie straight out of the dish with two forks, standing in the kitchen at midnight, just like we did when we were first dating and too broke to go out for fancy desserts.
Making It Ahead
This pie is actually a fantastic make-ahead dessert because it needs those chilling hours anyway. I've made it up to two days in advance and kept it covered in the refrigerator—the texture stays perfect and the crust doesn't get soggy at all. Just add the whipped cream topping the day you plan to serve it, otherwise it might start to weep and lose that fluffy texture that makes it so special.
Getting The Perfect Crust
After making this recipe a dozen times, I've found that pressing the crust mixture up the sides of the pie dish with the flat bottom of a measuring cup gives you the most even thickness. Don't be afraid to really pack it in there—too loose and your crust might crumble when you slice it, but packed tight it holds together beautifully. If you notice any spots that are getting too dark while baking, you can tent the edges with foil.
Serving Suggestions
This pie is surprisingly versatile when it comes to serving. I've brought it to brunches, served it as an elegant dinner party dessert, and even packed slices in containers for weekend camping trips. The firm filling holds up really well for transport. For a special occasion, try serving each slice with a small cup of cold brew or even a shot of espresso on the side.
- Run your knife under hot water and wipe it dry between slices for the cleanest cuts
- Let the pie sit at room temperature for about 5 minutes before serving if it's been in the fridge for more than a few hours
- Store any leftovers covered in the refrigerator for up to 5 days
 Pin it
 Every time I serve this, someone asks if I can make it for their next celebration, and honestly? That's the highest compliment a dessert can get. There's something pretty magical about watching people enjoy a dessert that fits their lifestyle without sacrificing a single bit of joy or flavor.
Recipe FAQs
- → How is the crust made crunchy without baking the filling?
-
The crust is baked separately until lightly golden and crisp, providing a sturdy base before adding the no-bake filling.
- → What gives the filling its firm texture?
-
Gelatin powder is used to set the creamy cold brew mixture, ensuring the filling holds its shape after chilling.
- → Can this be made dairy-free?
-
Yes, by substituting dairy cream cheese with plant-based alternatives and using coconut cream for whipping.
- → How can I enhance the coffee flavor in the filling?
-
Adding instant espresso powder intensifies the cold brew coffee's robust taste without altering texture.
- → Is the whipped topping sweetened and how?
-
The whipped cream topping is lightly sweetened with powdered erythritol for balanced sweetness without overpowering the coffee notes.
