 Pin it
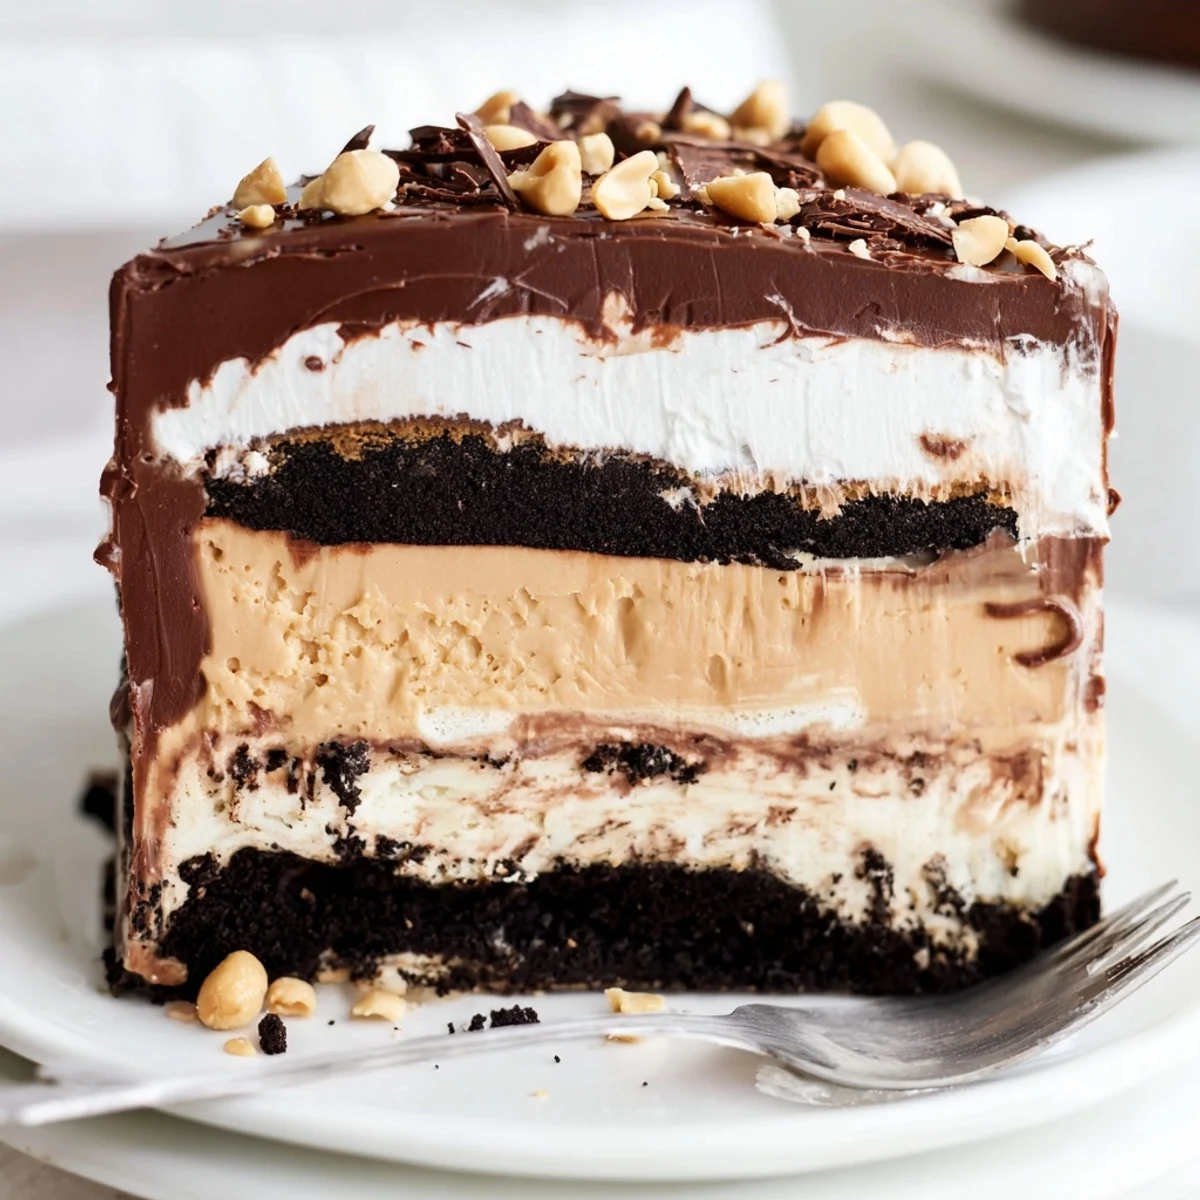
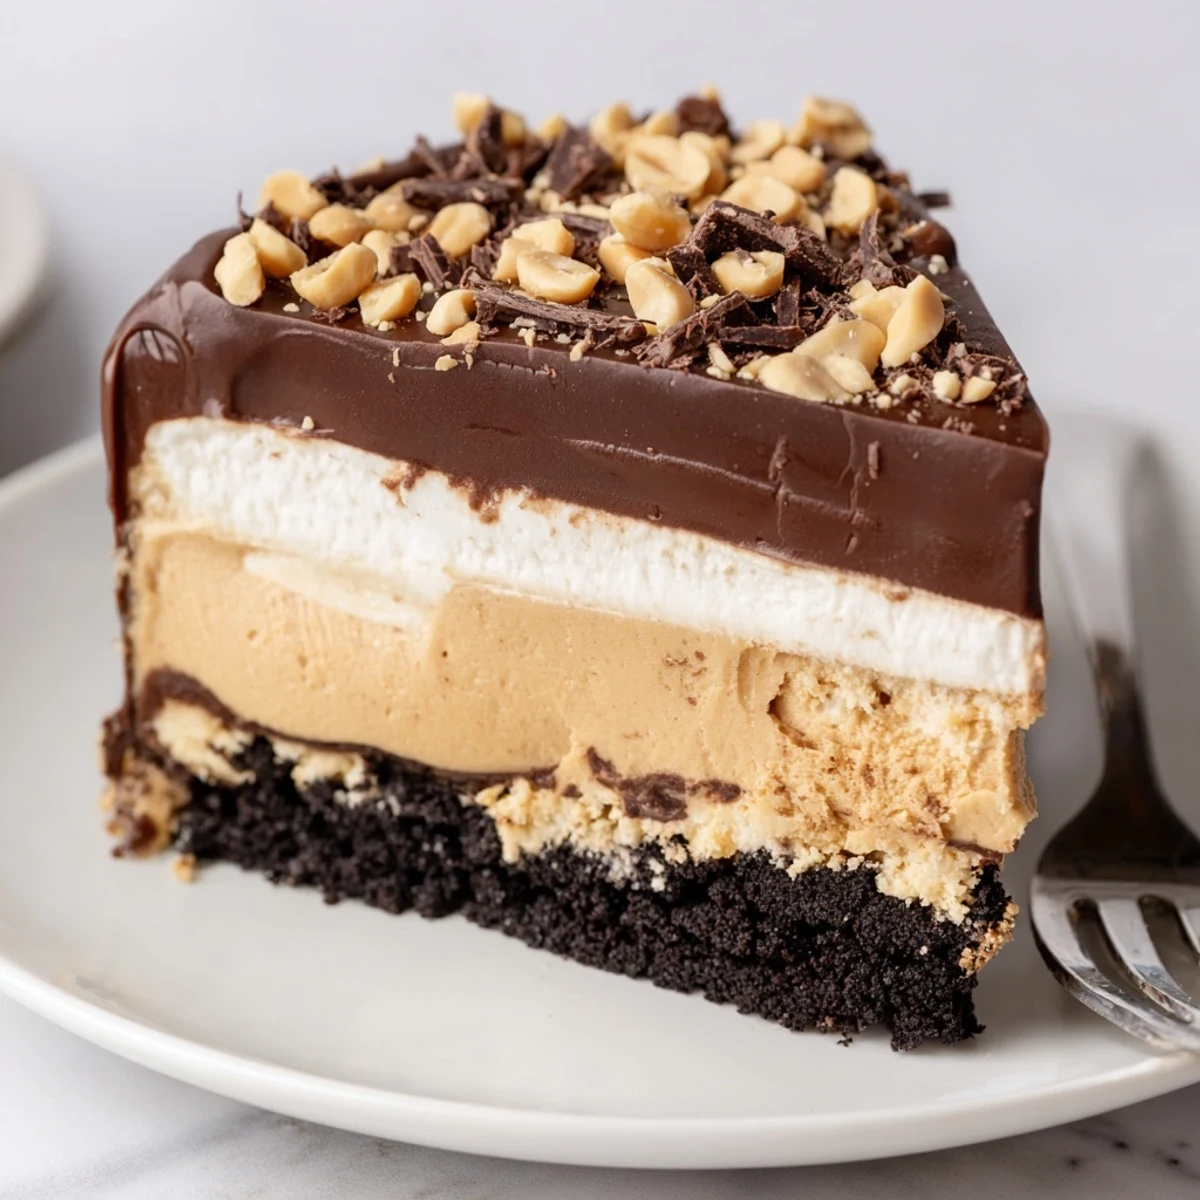
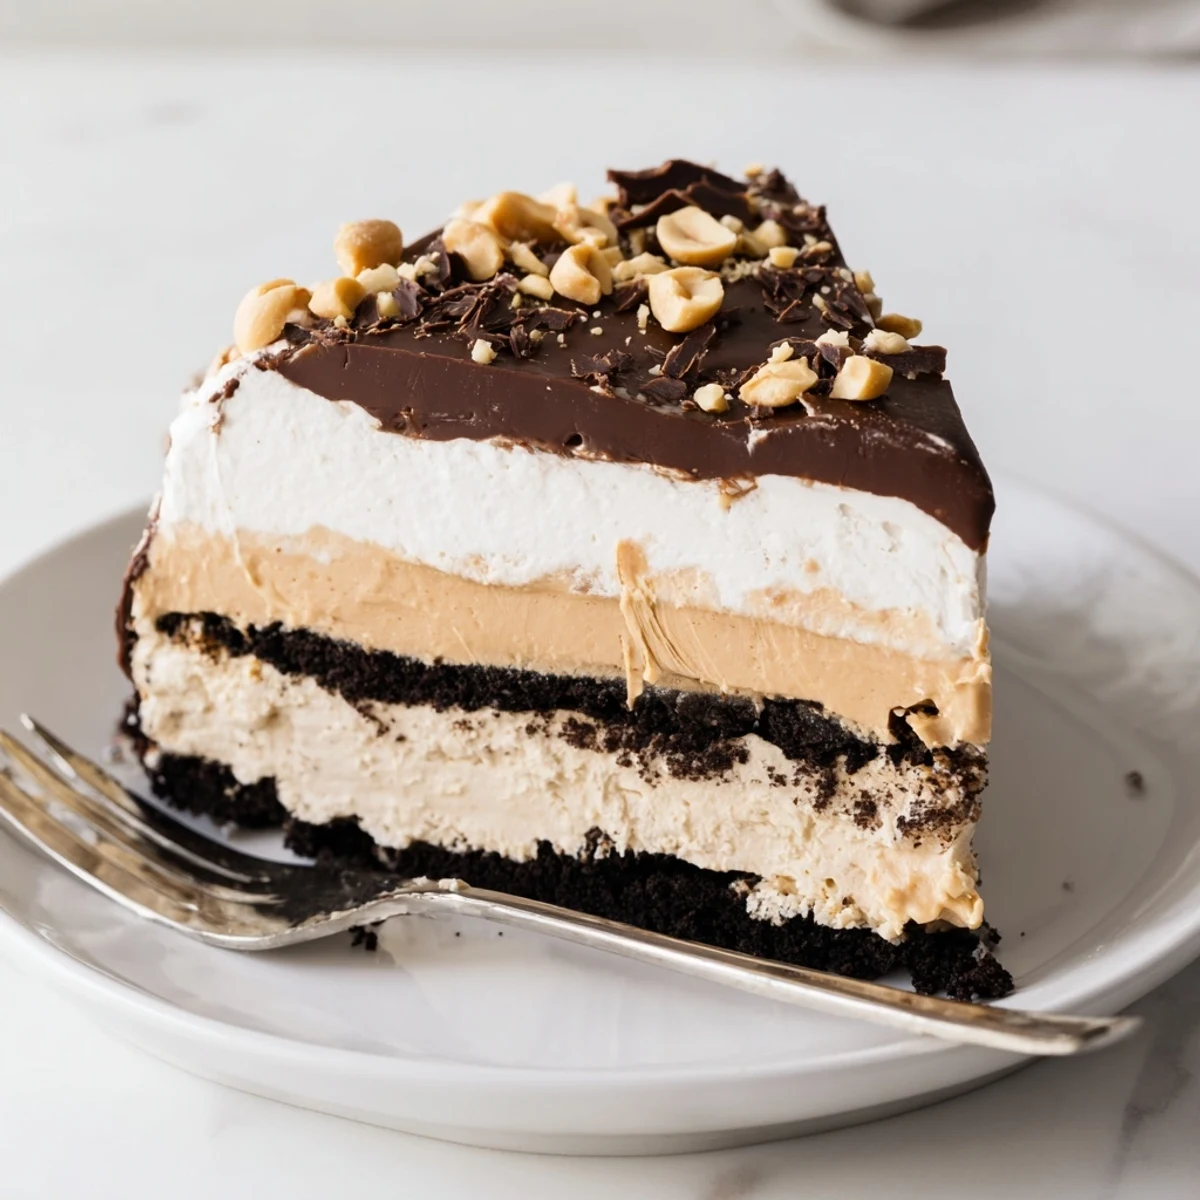
 This no-bake peanut butter layered delight is a fuss-free dessert that delivers big on texture and flavor. A buttery crushed-cookie crust forms the foundation, topped with a silky cream cheese and peanut butter mousse, a glossy chocolate ganache layer, and finished with fluffy whipped topping and crunchy peanuts.
With just 25 minutes of hands-on prep and a 4-hour chill, it's an ideal make-ahead treat for gatherings, potlucks, or weekend indulgence. No oven needed — just mix, layer, chill, and serve.
The afternoon sun was brutal that July, and my ancient apartment oven had just informed me, with a definitive click and silence, that it had retired early. I had dinner guests arriving in five hours and a grocery bag full of cream cheese and peanut butter that was rapidly softening on the counter. That is how this layered delight was born out of pure desperation and a working refrigerator.
My friend Rachel took one bite, set down her fork, and stared at me for an uncomfortably long time before asking why I had been hiding this from her for years. I had to admit I had invented it three hours earlier. She still requests it every birthday.
Ingredients
- Chocolate sandwich cookies (200 g): The base needs cookies with real cocoa punch, and generic brands sometimes crumble too finely so stick with Oreos or something similarly sturdy.
- Unsalted butter (60 g), melted: This binds the crumbs together and a little extra never hurt anyone if your cookies are on the dry side.
- Cream cheese (250 g), softened: Let it sit out for at least forty five minutes because cold cream cheese will leave you with lumpy peanut butter filling no matter how hard you beat it.
- Creamy peanut butter (180 g): Use the standard sweetened kind here, not the natural separated stuff, since it blends smoother and sets better in the chilled layers.
- Powdered sugar (100 g): Sift it if it has been sitting in your pantry for a while to avoid tiny white pebbles in your filling.
- Whipped topping (150 ml plus 200 ml), thawed: One portion folds into the peanut butter layer for airiness and the other crowns the whole dessert like a cloud.
- Semisweet chocolate chips (120 g): These melt into a glossy ganache that firms up beautifully when chilled and cuts the sweetness of the peanut butter layer.
- Heavy cream (80 ml): This is what transforms plain melted chocolate into something pourable and luxuriously smooth.
- Chopped roasted peanuts (30 g, optional): A scattered handful on top adds a welcome crunch that makes people reach for seconds.
- Chocolate shavings (optional): These are purely for showing off and I fully encourage it.
Instructions
- Build the crust:
- Crush the cookies in a zip top bag with a rolling pin or pulse them in a food processor until you have fine crumbs that resemble damp sand when mixed with the melted butter. Press this mixture firmly and evenly into the bottom of your pan, using the bottom of a glass to really compact it, then freeze for fifteen minutes while you work on the filling.
- Whip up the peanut butter filling:
- Beat the softened cream cheese, peanut butter, and powdered sugar together until completely smooth and no streaks remain, scraping the bowl at least once. Gently fold in the first portion of whipped topping with a spatula, using sweeping motions so you do not deflate it, then spread this fluffy mixture over your chilled crust.
- Pour on the chocolate:
- Combine the chocolate chips and heavy cream in a microwave safe bowl and heat in twenty second bursts, stirring between each one, until you have a glossy ganache that coats the back of a spoon. Let it cool for about five minutes so it does not melt the peanut butter layer beneath, then pour and spread it evenly across the top.
- Chill patiently:
- Cover the pan loosely with plastic wrap and refrigerate for at least four hours, though overnight is even better because the layers set into distinct, sliceable sections that hold their shape beautifully.
- Crown and serve:
- Spread the remaining whipped topping over the firm chocolate layer, scatter chopped peanuts and chocolate shavings if you are using them, and slice with a sharp knife dipped in hot water for the cleanest cuts.
 Pin it
 The following Thanksgiving I brought this to my family gathering instead of the expected pumpkin pie, and my uncle Bob, a man who has never once complimented a dessert in thirty years, quietly took a second piece before anyone else noticed.
Swaps and Twists That Actually Work
Almond butter or cashew butter can replace the peanut butter entirely, though the flavor becomes milder and slightly sweeter so you may want to dial back the powdered sugar by a tablespoon or two. I once used Biscoff cookie spread on a whim and the result tasted like spiced autumn in every forkful. For the base, crushed pretzels add a salty snap that plays brilliantly against the sweet chocolate layer.
Feeding a Crowd Without Stress
This recipe scales up effortlessly to a rectangular pan if you are feeding more than eight people, and the clean geometric slices look fantastic on a dessert buffet. I have also made individual portions in small Mason jars for a backyard party, which eliminates the need for slicing entirely and makes everyone feel like they got their own personal dessert. Just keep the layer ratios roughly the same and chill them a little longer since glass insulates differently than a springform pan.
Keeping It Perfect Until Serving Time
This dessert actually tastes better on the second day when the flavors have mingled and the cookie base has absorbed just a hint of moisture from the filling above it.
- Cover the pan tightly with plastic wrap or a fitted lid so the whipped topping does not absorb refrigerator odors.
- It holds beautifully in the fridge for up to three days but the peanut garnish will soften after day two.
- Always add the chocolate shavings right before serving so they stay crisp and visually striking.
 Pin it
 Keep this one in your back pocket for every hot day, every broken oven, and every moment you need a showstopper without breaking a sweat. It has never once let me down.
Recipe FAQs
- → Can I make this dessert ahead of time?
-
Absolutely. In fact, it benefits from being made ahead. You can prepare it up to 24 hours in advance and keep it refrigerated, covered tightly with plastic wrap. The layers set beautifully overnight and slice even more cleanly.
- → What can I substitute for whipped topping?
-
You can use an equal amount of freshly whipped heavy cream sweetened with a tablespoon of powdered sugar and a splash of vanilla extract. Stabilize it with a teaspoon of gelatin if you want it to hold firm over several hours.
- → How do I get clean slices when serving?
-
Use a sharp knife dipped in hot water and wiped dry between each cut. Chilling the dessert for the full 4 hours (or overnight) ensures the layers are firm enough to hold their shape when sliced.
- → Can I use natural peanut butter instead of conventional creamy?
-
Conventional creamy peanut butter works best because it blends smoothly into the cream cheese layer without separating. Natural peanut butter tends to be runnier and can make the layer less stable. If you do use natural, drain excess oil and stir thoroughly before adding.
- → Is there a gluten-free option for the cookie base?
-
Yes. Simply swap the chocolate sandwich cookies for a certified gluten-free alternative. Many brands offer gluten-free chocolate sandwich cookies that crush and press into the pan just like traditional ones. Also verify the chocolate chips are processed in a gluten-free facility.
- → How long does this dessert keep in the refrigerator?
-
Stored covered in the fridge, it stays fresh for up to 4 days. The cookie base may soften slightly over time but the flavors continue to develop. Avoid freezing, as the whipped topping and cream cheese layer can become grainy when thawed.
